While I was on a roll, I decided to check on the beer too. It has been about 15 days since I started it going, so it should be coming along nicely.
There is clearly still activity which is pleasing given the gravity is currently at 1.016, with a target of 1.010 or less. I'm happy this is doing well at the moment, and I will be leaving it another couple of weeks before taking another reading.
Thursday, February 28, 2008
Linthwaite Light first gravity reading
Strawberry Wine looking good
After checking on the Merlot, I decided to see how the Strawberry was doing too. After leaving the hydrometer to soak in the sanitising solution for a couple of minutes I rinsed it and dropped it gently into the strawberry wine. Again, I photographed it so that I had a definitive record to compare against next time. Unfortunately I couldnt take a picture through the glass demijohn, so I had to take it through the opening:
| Day | Time per bubble (secs) | Gravity |
|---|---|---|
| 0 | infinite | |
| 1 | 8 | |
| 3 | 4 | >1062 |
| 6 | 1.5 | |
| 12 | 50 | |
| 19 | 103 (after hydrometer reading) | 1.008 |
As the picture shows, the gravity is around the middle of the small black band on the hydrometer, which is the 1.008 mark. This actually puts it in the target of 1002-1008, however, as it is still bubbling, all be it slowly, it has clearly not stopped fermenting yet. The instructions do state that it should not drop below 1.002, so hopefully it is fairly close to finishing.
Merlot check...
With the prospect of a free weekend on the horizon, I wanted to take a reading of the Merlot to have something to compare against at the weekend to see if it has finally stopped fermenting. Hopefully it will have done, so that I can transfer it to secondary and begin the final stages before bottling. I have taken to storing the hydrometer in a bottle containing water and sanitising powder so that I can take readings without any further sanitising hassle. I rinsed it and gently dropped it into the wine, and as mentioned previously, I took a picture:
| Day | Time per bubble (secs) | Gravity |
|---|---|---|
| 0 | infinite | 1.078 |
| 3 | 2 | |
| 5 | 9 | |
| 9 | 15 | |
| 12 | 18 | |
| 15 | 30 | |
| 21 | 55 | 1.000 |
| 24 | infinite (after hydrometer reading) | 0.998 |
| 27 | infinite | 0.997 | >
| 34 | infinite | 0.996 |
I think this has gone down a fraction more in the last week since the previous reading, but I'm hopeful it will now have finished. The target gravity of 990-994 is close enough for me to be fairly happy, but only time will tell whether this is close enough to still make a great wine.
Sunday, February 24, 2008
First IPA Tasting
I debated when to open the first bottle of my very first home brewed beer. I had intended originally to leave it at least one month, but some expert advice stated that it could be at its peak after as little as 4 weeks. This advice went against my experience when tasting Phil's homebrew (see my blogroll), as it seemed to get better and better up to at least 9 months in some cases, and not being close to its best until it had been in the bottles for 3 or 4 months.
My uneducated theory on these time differences is that it may be the case that after around 4 weeks, some of the strongest flavours like the hops and bitterness begin to fade slowly. However, other flavours grow as the beer matures. Therefore as time goes by you get a deeper, more blended and more well rounded beer, which to my personal pallet, is much more favourable.
Getting back to the point, I decided that as this is my first beer, I need to learn as much as possible about the phases the beer goes through, so opening a few of my 42 beers before the beer is at its best will be worth it. So, on Friday, 10 days after the beer had been bottled, I opened my first one.
I opened the very last bottle I bottled (one with a gold cap if you read the bottling post here). This would therefore have had a number of the lumps of yeast in. There was also the chance that it had extra priming sugar in, given I had intended to leave the beer with the priming sugar mixed in for around 30 minutes, but it had well over an hour as I cleaned all the bottles.
There was a pleasant fizzing sound as I popped off the cap. I poured it carefully and no head really appeared until I straightened the glass to pour the final third in, but even then it was just a very short-lived co2 head and was gone in 30 seconds. There were lots of bubbles rising in the beer to start with. As the picture shows, the beer was very dark, and not very clear at all. The aroma was pleasant, though very mild. I would say it was a slightly fruity smell.
When I finally tasted the beer, I was rather disappointed. It had very little flavour at all - barely anything to have an opinion on. It was pleasantly fizzy, but perhaps already slightly more fizzy than I would want an ale like this to be. There was a very slight after taste to the beer. It wasn't very noticeable, but I might describe it as a slightly yeasty taste. The beer was also quite sweet. This made it hard to drink.
My overall feeling currently is disappointment, but I still have some hope for this beer. This was after all the last beer bottled, so the the yeasty taste, the fizz and the sweetness could all be explained by this. The desired flavour I hope will come with time, as will clarity. I intend to leave it a couple of weeks before opening another one, which will be one of the first I bottled.
Thursday, February 21, 2008
Massive slowdown in the Strawberry
After checking on the Merlot, I realised I hadn't done a bubble count on the Strawberry in a while, so I sat down by the demijohn with a watch and timed how long it took, on average, between bubbles:
| Day | Time per bubble (secs) | Gravity |
|---|---|---|
| 0 | infinite | |
| 1 | 8 | |
| 3 | 4 | 1062 |
| 6 | 1.5 | |
| 12 | 50 |
Comments:
- The bubble rate has dropped massively, but I did forget to take any readings for 6 days.
- Given the very fast bubble rate previously, it is possible that this could have could the Merlot up and almost have finished fermenting.>/li>
- Given the goings on with the Merlot uncertainty, despite the suggestion from the bubble rate that the Strawberry might be coming to the end of fermentation, I will be leaving this alone for a week or so yet.
- I will give the Strawberry plenty of time to finish. All the advice is that leaving it in the primary for longer, even if fermentation finishes, should do no harm at all.
- It should continue to provide me with feedback via the airlock.
Merlot still going...?
I took another reading of the Merlot with a hydrometer, having convinced myself it must have stopped fermenting and I wanted to get it into the secondary demijohn. The hydrometer dropped to a level where only the very top of the yellow section was visible, and none of the digits of 1.000 could be seen. Given the results of my hydrometer test showed I should be taking a line from just above the actual level of the liquid (not the level of the bell), this is a reading of about 0.997. I didn't take a photo as I didn't want to expose the wine to a bright flash, but I wish I had so I could look at it again.
I have tried to be very descriptive about the reading this time, so that I have something to compare against next time I take a reading. The reading does seem to be below the 0.998 from last time, but now I am doubting my reading from last time. Hopefully if I leave it another 5 days or more, if I can see any of the yellow section, fermentation is over. If I can't, I should leave it longer.
I should add that I have still seen no bubbles at all from the Merlot recently, and not even any sign that pressure is moving the water round the airlock at all.
| Day | Time per bubble (secs) | Gravity |
|---|---|---|
| 0 | infinite | 1.078 |
| 3 | 2 | |
| 5 | 9 | |
| 9 | 15 | |
| 12 | 18 | |
| 15 | 30 | |
| 21 | 55 | 1.000 |
| 24 | infinite (after hydrometer reading) | 0.998 |
| 27 | infinite (after hydrometer reading) | 0.997 |
Conclusions:
- From now on, I will photograph my hydrometer readings. Any exposure to the flash will be worth it I think, given it will save me doubting readings, and making extra readings because of it.
Monday, February 18, 2008
Merlot Impatience
Since taking the hydrometer reading 3 days ago, I have been keeping an eye on the airlock on the Merlot to make sure it got going again. In 3 days I hadn't seen a single bubble. I put the first day down to it needing to fill up the remaining space with co2 before it started coming through the airlock, but after 3 days I was worried it had stalled.
I decided my best bet would be to try to get a bit more of the yeast suspended back into the wine, so I removed the airlock, placed a clean thumb over the hole and very slowly and carefully turned the container upside down so as to get some of the yeast off the bottom, while trying not to let the wine splash or bubble.
Having done this, I decided to take a hydrometer reading just to confirm nothing had changed. (Yes, I know I should have done this first.) I was surprised to find the reading was 0.998, though now I'm not sure if this is because of the extra yeast suspended in the wine, or if it really has been fermenting, despite the lack of bubbles. I will try to do some research to see if yeast would decrease the gravity and post an edit back here.
| Day | Time per bubble (secs) | Gravity |
|---|---|---|
| 0 | infinite | 1.078 |
| 3 | 2 | |
| 5 | 9 | |
| 9 | 15 | |
| 12 | 18 | |
| 15 | 30 | |
| 21 | 55 | 1.000 |
| 24 | infinite (after hydrometer reading) | 0.998 |
I think this is the first time since I started brewing that I have let impatience affect my brewing. Hopefully I haven't done any damage, but I will be sure to leave it a while now before taking another reading.
Friday, February 15, 2008
Linthwaite Light fermenting
Having been concerned about pitching the yeast into the Linthwaite Light mixture at only 14 degrees C, I had meant to check on it after a day or so to check it had started fermenting ok. I kept forgetting, but finally got round to taking the lid off today and having a look.
As the picture shows, there were clear signs of fermentation. The beer has been bubbling away, so I am very pleased. I saw no reason to disturb it with a hydrometer reading, so I gently replaced the lid, re-covered the bucket with a towel and left it to do its stuff.
Strawberry bubbling like crazy
While I was checking on the Merlot, I spotted that the Strawberry was bubbling away much faster than it was previously, so I decided to do another count for future information:
| Day | Time per bubble (secs) | Gravity |
|---|---|---|
| 0 | infinite | |
| 1 | 8 | |
| 3 | 4 | 1062 |
| 6 | 1.5 |
It really is bubbling fast now. The temperature in the brewery is around 17 degrees currently so I don't think it is too hot, so hopefully this is fermenting as it should. Interesting at this point the Merlot had already slowed to more than 9 seconds per bubble. It will be interesting to see if the Strawberry finishes fermenting any quicker.
Checking the Merlot
It is 3 weeks to the day since I set the Beaverdale Merlot going. the results of another bubble check are below:
| Day | Time per bubble (secs) | Gravity |
|---|---|---|
| 0 | infinite | 1.078 |
| 3 | 2 | |
| 5 | 9 | |
| 9 | 15 | |
| 12 | 18 | |
| 15 | 30 | |
| 21 | 55 | 1.000 |
As you can see, the wine is now getting close to the target of less than one bubble a minute. I decided to take a hydrometer reading in order to see for certain the state of the wine. As shown in the table, the reading was exactly 1.000. The instructions state that the target is 0.990 to 0.994. I'm pleased to see that the wine has made it a long way down from 1.078. I hope it can make it down just a few more points now. Hopefully by recording the bubble rates and gravity with this, my first wine, I will have a better understanding for future wines of whether it is likely that it will drop further points now that its almost at just 1 bubble a minute.
I also had a little taste (just the juice off the hydrometer). It didn't taste unpleasant, but it had a very alcoholic taste - like a very cheap wine. I was a bit disappointed, but hopefully it will just take time for the flavours to mature.
Wednesday, February 13, 2008
Topping up the Strawberry
Yesterday evening marked 3 days since I had set the Brewmaker Strawberry wine going, so according to the instructions it was time to top up the demijohn to the 4.5 litre level. Before doing this I measureed the bubble rate again:
| Day | Time per bubble (secs) | Gravity |
|---|---|---|
| 0 | infinite | |
| 1 | 8 | |
| 3 | 4 | 1062 |
Now onto the topping up. The instructions stated that "tepid" water should be used, so I filled up a sanitised jug a couple of times with cold tap water and a hint of boiled water and topped up the wine to the 4.5 litre level I had marked when starting the Strawberry. The instructions then stated that I should shake the demijohn well. This still seemed very strange given the beer and wine I had done previously required air to be kept out. However, I placed a sanitised bunk in the demijohn and shook fairly lightly for 30 seconds. There was a noticeable sediment layer on the bottle of the demijohn already, so I wonder if this instruction is about re-suspending the yeast (though the instructions only suggest this for certain flavours of wine - and the flavour is only added at the end of fermentation - all very strange).
Anyway, with the demijohn now filled to the required level and mixed I thought I would take a hydrometer reading. This came in at 1062. I then replaced the airlock (after replacing some lost water from it) and took a picture.

I finally placed the demijohn back in the brewery and wrapped the tea towel around it. I will continue to monitor the the bubbles over the next few weeks.
Brewing up a Linthwaite Light

As soon as I got my previous brew bottled (the Munton's IPA) I gave the fermentation bucket a quick clean to remove all the obvious dirt and then left it full of a sanitising solution all day, with the stirrer and the lid in it. (I rotated the lid a few times as only half of it would fit in the bucket at once.) I didn't have much time in the evening, but I decided that there was still time to get the next brew going. I wanted to do it asap or else it could be another week before I got time again. I rinsed out the bucket as well as the stirrer and top and was ready to go.
I placed a can opener, jug, thermometer and hydrometer in the sink and covered them with warm sanitising solution. I also placed the two cans from the kit in the water to soften up the contents. After a few minutes I rinsed the jug and thermometer and half filled the jug with water from a boiled kettle and the cold tap, until I had water at about 20 degrees C. I added the sachet of yeast to the jug and gently stirred it with the thermometer. Initially some of the yeast stuck together in clumps but I ensured I broke these down, and then left the yeast on the side.
I rinsed the cans and the can opener, and opened the two tins, pouring the contents into the fermentation bucket. I then filled both tins with boiling water from the kettle and stirred both. Into one tin I also added the hop bag (like a large teabag) to impart the hops flavour and left this for 15 minutes. I removed the bag and poured both tins into the bucket again. I stirred the mixture in the bucket for about 5 minutes, until it was completely mixed. As with the last brew, it was easy to see when this was done as no extract remained on the stirrer. I then proceeded to fill the bucket with jugs of cold water from the cold tap up to the 4.5 litre level marked on the side. I deliberately poured this into the bucket very quickly and from a high, as well as filling the jug from the tap very quickly, in order to add as much air as possible.
Once the bucket was full, I measured the temperature of the contents, to ensure it was below 25 degrees C (as per the instructions). I found, due to the very cold temperature of my cold tap, the contents were actually at 14 degrees C. I was a little worried this might be too cold for the yeast, but decided to go ahead anyway. I pitched the yeast, which now had a small head on it, and stirred the bucket for another 5 minutes to ensure as much air was taken in as possible. I then took a hydrometer reading, for future reference. It was hard to see the exact level due to the head on the beer, but the hydrometer dropped to about the bottom of the red section - a reading of 1040.
Finally I gently rested the bucket lid on top of the bucket, and moved the very heavy bucket into the brewery and placed it on a large book, so that I would be able to attach a tube to the tap later on.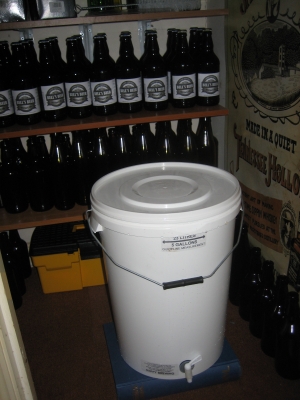
I wrapped a warmed towel around it and the job was done. However, I was still worried about the low temperature of the beer, so I whipped out the missus's hair dryer and gave the bucket a quick blast of hot air all around the base under the towel. Hopefully this will have helped bring the temperature up a couple of degrees.
Unfortunately, due to having to get this brew going quickly, I didn't have time to put an airlock in the fermentation bucket lid like I had intended so I will have to do without that feedback with this brew. Hopefully I will add it next time.
Tuesday, February 12, 2008
Munton's IPA bottling day

At last, the time had come to get my beautiful beer into bottles. I'd spend a lot of time working out exactly how I was going to do this, so I felt well prepared.
I started off by filling the trial jar I bought on Saturday using a sanitised tube connected to the tap. Using the hydrometer, I confirmed that the gravity was still around 1015, and also confirmed that the beer was coming out of the tap ok - it was cloudy but with no noticeable sediment from the bottom of the bucket. I took a taste and found the flavour very mild and rather shallow, but pleasant none the less. Hopefully with time in the bottle the flavour will develop, but I was pleased to still find no unwanted flavours at all. I lifted the bucket from the floor of the brewery, to the work surface in the kitchen.
Next I needed to add the sugar. After lots of indecision (worrying - thats what homebrewers do while waiting for their brews to do their stuff), I finally decided to add the sugar into the bucket before bottling, rather than added sugar to each individual bottle. This was considerably quicker and easier, and some research had reassured me that a gentle stir would not bring up the sediment from the bottle of the bucket. I weighed out 80 grams of glucose. This might be be slightly preferable to granulated sugar in terms of flavour but it is unlikely to be noticeable with such a small amount. In all honesty, I used it as it came with the beginners equipment I was given. I used 80 grams rather than the 85 recommended partly because by beer was already above the target gravity (and so slightly over sweet) but this also matched some recommendations from the web. I added the glucose to a jug, and poured on freshly boiled water - just enough to cover it. With a quick stir it was all dissolved. I covered the jug with clingfilm and made a couple of holes in the film before placing the jug in the microwave on full power until it began to bubble. This should ensure the sugar is sanitised. I left this to cool for a while, and later added it to the beer, very slowly making as little splashing as possible. I very gently stirred the beer for 20 seconds with a sterilised stirrer. Before adding the sugar, I had noticed quite a lot of clumps of a soft brown substance floating on the top. I hoped these wouldn't be a problem.
Next it was onto the bottles. Thankfully the 48 bottles that Phil had ordered me as part of my Christmas present had now been delivered, so I didn't have to complete the cleaning of all the donated bottles - that can wait for the next batch. I also included 4 of the cheap lager bottles I bought previously, as a tester for using more of them next time. During my trip to the brew shop on Saturday I had also bought a bottle tree, thinking that this would be the easiest way to dry 45 bottles at once. Having constructed the bottle tree (only 5 large pieces) and sterilised it, I filled the sink with water and sterilising solution and placed in 8 bottles. For about the next 45 minutes I continually took out 4 bottles and place them on the bottle tree, and added 4 new bottles to the sink. I always aligned 4 bottles facing towards the taps and 4 away in the sink, and with the most recently added bottles resting on top, so I could always see which bottles had been in the longest. I returned every 5 minutes to swap the bottles, so each bottle got 10 minutes of soaking. With the final few bottles, I also dropped in the crown caps to sterilise them.
I was certainly correct about the bottle tree - what an awesome purchase - I don't know how I would have coped without it.
Once all the bottles were done, I removed them all, emptied the sink and, after rinsing the bottle tree, and proceeded to rinse each bottle in cold water and place it back on the tree.
In the gaps between cleaning, I had finished cutting out the labels I had printed out (using a craft knife and ruler). I laid these on the floor alongside a bowl with a little milk in, and a pastry bush. Between these and the beer bucket I laid the sanitised and rinsed crown caps in a bowl, and the capper which I got with my original equipment. I attached the sanitised tube to the tap again and let this fall to the floor and into a sanitised washing up bowl.
Finally it was time to actually put my beer into bottles. I pushed the tube right to the bottom of the first bottle and slowly opened the tap. The first couple of bottles I filled too quickly, giving them something of a head inside the bottles. This also didn't give me enough time to cap and label the bottles. I quickly found a nice slow pace was best. I also discovered that lifting the tube a little when the bottle was almost full allowed me to easily fill to within a couple of centimetres of the top of the bottle. I also added a clean towel to my setup, on which I placed each just filled bottle. This dried the bottom of the bottle and also allowed me to wipe any beer from the bottle ready for labelling. I spent the next 45 minutes repeatedly filling, capping and labelling. Having everything laid out for this turned out to be a very good idea:
The first 30ish bottles all filled easily and without incident. However, after that, I started to find that bottles would only half fill and then the flow would slow or even stop completely even though the tap was still open. I found this was due to the clumps that had been left floating on the surface of the beer being drawn into the tap. I couldn't see any sensible way of preventing this, so I continued bottling. I found that lifting the tube up a little would often free the flow, or failing that, opening the tap further worked (all be it with the occasional sudden overflow). Given these bottles would now likely have these clumpos in, I decided to label them as such, and put a small "L" on these bottles to remind me which were bottled later in the process. As I got to the last few I added "VL" for very late, as these were picking up quite a lot of the clumps. I even bottled a couple of extra bottles by tilting the bucket up. This were capped with a different colour cap (mostly because I had used the 40 blue caps now) but this was also a useful further indication that these last 2 would definitely not be ones for sharing.
It was a very satisfying sight when I finally had 42 capped and labelled bottles on the kitchen floor.
I took the 4 beers in the thin lager bottles, and a couple of standard bottles and put these in a big black bin in my study. Hopefully, these will be fine, and I can use more of these thinner bottles with the next brew. However, if something does go wrong, at least the damage should be contained.
I must have been on a roll on bottling day, as I managed what I now think was another very good idea. In addition to labelling the last few bottles, I managed to keep all the bottles in the order I had bottled them. I maintained this order when putting the bottles on the shelf in the brewery, so that when picking a bottle to drink, I will be able to tell when it was bottled. This will be useful not only for seeing the effects of the clumps and any sediment that got picked up in later bottles, but also for seeing if the sugar (and so fizz) is equally distributed, or whether it dropped down the bucket while I was cleaning all the bottles. It will also allow me to select bottles for friends and family from whichever part of the bottling produced the best final beer.
If I felt satisfied after I finished labelling the last bottle, I felt even better when I had them all neatly shelved.
Job done. Now we wait...
Monday, February 11, 2008
The Strawberry is fermenting
Having started to Brewmaker's Strawberry wine, I was keen to check whether it had started fermenting, so I did a bubble count yesterday:
| Day | Time per bubble (secs) |
|---|---|
| 0 | infinite |
| 1 | 8 |
Observations:
- I was pleased to see it bubbling, though a little concerned its not as quick as I'd hoped.
- My first Merlot reading was after 3 days, so it will be interesting to compare then.
Saturday, February 9, 2008
Brewmaker Strawberry Wine
Given that my lovely ladyfriend has not only been ok with my new hobby but she has actively encouraged me, I thought I should have a stab at Strawberry wine she was eyeing up on our first trip to the brew shop. I was already planning a trip back to Harvey's (see 4u2brew in my blogroll) so added 2 second hand glass demijohns (at just £2.49 each), 2 rubber bungs and airlocks, a bung without a hole in to help with shaking the bottle, and a pack of the Brewmaker Strawberry wine. There was a choice between Young's or Brewmaker's, but the owner said they were moving to sell only the Brewmaker's as it was easier to make a good wine with.
The pack contained a tin of juice and, hidden in a plastic top on the tin, 5 sachets of ingredients and some instructions.
After giving one of the demijohns a good couple of hours full of a strong sterilising solution and then a good rinse, I got to work on the wine instructions. I opened the tin (having placed the end I was going to open in sterilising liquid) with a sterilised can opened. I didn't have a funnel, so I poured the contents into a jug to ensure I could pour it into the demijohn without spilling any. In addition to the juice, I added a further 1.8 litres of cold water to the demijohn. (I did realise as I was getting started that I hadn't sterilised the jug. It had already been cleaned, so I rinsed it with just boiled water, so hopefully that will be ok.)
I weighed out 16oz of granulated sugar (Tate and Lyne cane sugar) and poured it into the jug, which I had filled with 500ml of fresh boiled water, and began stirring. I was supposed to add the sugar to 600ml but the jug wouldn't hold this plus the sugar (I found this out the stupid way but I don't think I lost too much sugar, and I added some extra water to the demijohn). I took the boiling water from the kettle, and by the time I'd poured in the sugar I think it had cooled a bit so it was a struggle to get all the sugar to disolve, but I just about managed it, and then added the liquid to the demijohn.
I carefully poured the contents of 2 sachets into the demijohn, the first being wine yeast, and the second Nutrafine. I then placed the bug (without a hole in) in the demijohn and shook the bottle for around a minute to ensure everything was well mixed. I then placed the airlock in another bung and pushed it into the demijohn to seal it.
Finally I placed the demijohn in the brewery and wrapped a tea towel around it. There is nothing more to do now for 3 days, when I will have to add the remaining water to make it up to 4.5 litres.
Comments:
- I don't have very high expectations for this kit. I'm more into my traditional wines, but hopefully this will turn out well, and more importantly my girlfriend will like it.
- The instructions suggest the wine should now be stored somewhere with a temperature between 20 and 30 degrees C. The brewery is definitely lower than this, and given the wine was made with cold water, I hope it ferments ok.
- I will be looking out for bubbles tomorrow.
- I am surprised that the kit suggests adding water and then shaking after three days at which point the fermentation will have begun. With the beer, and aeration of the liquid while fermenting is a big no no. I will try to do some research on this before the 3 days are up.
Wine check
I am making a trip to the brew shop today, and I'm tempted to buy another wine kit and a couple more demijohns so that I can have the current one in secondary and two more in primaries. However, I didn't want to start another couple of wines if the current one was struggling in the cool temperatures, so its time to take a hydrometer measurement. I carefully moved the demijohn to somewhere I could see it more clearly, removed the top and gently placed in the sterilised hydrometer. I was pleased to see it drop pretty low, and when I took the reading it was at about 1.006. It still has another 8ish points to drop, but it has already dropped 72 points and it was still bubbling so I'm hoping its possible.
Prior to taking the reading I also did another bubble count:
| Day | Time per bubble (secs) | bubbles per minute |
|---|---|---|
| 0 | infinite | 0 |
| 3 | 2 | 28 |
| 5 | 9 | 7 |
| 9 | 15 | 4 |
| 12 | 18 | 3 |
| 15 | 30 | 2 |
Friday, February 8, 2008
Hydrometer Test
Given the fact that the Munton's IPA appears to have stopped slightly short of the target gravity according to the hydrometer reading, I thought I should test the hydrometer's accuracy. An accurate hydrometer should measure exactly 1.000 in pure water at 20 degrees C.
I filled a bottle with water from the hot and cold tap, and after more messing about than I think it should have taken, I finally had a bottle containing 20 degree C water. I popped the hydrometer in and took a picture...
The line visible around the water level is the 1.000 line. It was noticeable that this line is below the top of the bell of water gathered around the hydrometer, but (when trying to read it from above the water) it appears to be slightly above the true level of the water. I would have liked to have been able to test this in coloured water, so that I could more accurately see where the correct level is with an opaque liquid like beer, but of course mixing the water with cordial would have added sugar and invalidated the experiment.
This was only a very quick experiment, but it has been useful. It showed that the hydrometer is pretty accurate. I also think that it means I have been very slightly over estimating the gravity of my beer. I had assumed that the actual level I was recording would be just out of sight below the visible level but looking at this experiment I believe the level I should be reading should be visible.
Just about bottling time.

With the prospect of some time on Sunday where I might be able to bottle the Munton's IPA , I decided it was time to take a hydrometer reading. I still don't have a trial jar, though I hope to get one from the homebrew shop on Saturday. That mean carefully taking the lid off, at which point there was a noticeable hiss - yet more signs of life I hoped. I gently placed the hydrometer in the beer and took the above picture, before also holding the thermometer in the beer. The temperature settled at 16.5 degrees again. The gravity however I still find a little difficult to read, what with the markings only down one part of the hydrometer, as well as trying to decide exactly what level the reading is at. I settled on a reading of 1016, or possibly a tiny fraction below (though certainly much closer to 1016 than 1015). I had hoped for a reading of 1014 or less - the suggested finishing gravity in the instructions, but it does look like fermentation has just about finished, having changed so little now.
If it looks like I will have time to bottle on Sunday, I will first use the trial jar I should have by then, and take a final reading and a taste. If the gravity is still at 1016 and it tastes nice, I will bottle it. While at the brew shop, I will buy some light spraymalt to prime the bottles with (as suggested by the instructions on the box (and on various forums). I believe this is a better choice that standard sugar, in terms of the final flavour produced. I have opted to prime the bottles as I do not have a bottling bucket to siphon the beer into (while leaving the yeast sediment behind) and I do not want to stir sugar in and disturb all the sediment. I have bought some cheap measuring spoons to ensure I can prime each bottle with a very similar estimate of 1/2 teaspoon of spray malt, hopefully reducing the chances of any explosions.
I am looking forward to getting this brew bottled, both so that its closer to being ready and so that I can kick off the next one and see how well that copes with the temperatures.
Monday, February 4, 2008
Yet more Merlot bubbles...
Another few days have passed, so Im counting the bubbles coming from the Beaverdale Merlot again:
| Day | Time per bubble (secs) | bubbles per minute |
|---|---|---|
| 0 | infinite | 0 |
| 3 | 2 | 28 |
| 5 | 9 | 7 |
| 9 | 15 | 4 |
| 12 | 18 | 3 |
The fermentation is continuing to slow, but I'm reassured that despite it being about a week and a half since it started, it looks like the wine is still some way off the one bubble per minute that should indicate fermentation is over. I feared this would come very early, indicating a stuck fermentation. I'm still keeping everything crossed though.
Saturday, February 2, 2008
The Label Experiment Results - Final Review
Before starting this experiment I had expected stickers to look more professional, but paper to come off more easily. I was not exactly very accurate with my predictions. Paper, regardless of how it was attached, made the most impressive looking labels, and all the labels came off incredibly easily.
My intention, based on these results, is to use paper, attached using milk, for bottles that I will give to people, and stickers attached straight to a dry bottle for my own supply. This is because the paper labels will require more work, what with having to neatly cut them out and applying the milk carefully, but will give a really good finish. The stickers will be much less effort but should still look ok if applied carefully, and will still be effortless to remove.
The Label Experiment Results - Part 2: Removal
Having inspected the bottles for appearance, I soaked all 6 bottles in hot slightly soapy water in the sink for 10 minutes, without touching them at all. On returning to the sink, I was surprised to find all 6 labels floating around the water. Not one of them even needed peeling off?
I had expected the labels using stickers to be a bit of a pain, but there was very little to choose between all the bottles. The milk label had left the milk residue on the bottle, but this effortlessly wiped off. The sticker applied with glue stick had lots of glue residue left on the bottle, but this also came off with a single wipe. All the other bottles were pretty much spotless, with perhaps a single tiny residue on some, which again wiped off instantly.
This part of the experiment has shown that, given I would give each bottle a quick wipe anyway when cleaning and removing the labels, there is nothing to choose between the methods of attaching the labels as far as removal is concerned.
The Label Experiment Results - Part 1: Appearance
It has been over a week since I started the label experiment so its time to find out the results. In this post I will order the labels by appearance, in reverse order:
Appearance:
6th: Sticker pressed on jumper first
The label is a little scruffy looking. It has a few major crinkles on and slightly light and dark patches on it. The corners are also peeling off. The method definitely has an amateurish look.
5th: Sticker on wet bottle
There are a number of crinkles on this label too. (One of these does seem to be due to 'seam' on the bottle though.) The edges are all fairly well attached though. Still not a very professional finish.
4th: Plain Sticker
This label has a few crinkles. It has some slightly light and dark areas. The edges seem to be attached fine. Another pretty poor finish though.
3rd: Sticker with glue stick
This has only minor crinkles on. The colour of the label is more consistent (though I think this is because the whole label is dark because you can see more of the bottle colour through it.) The edges are all perfect. Of all the labels done with stickers, this is the only one that looks nicely finished.
2nd: Paper with glue stick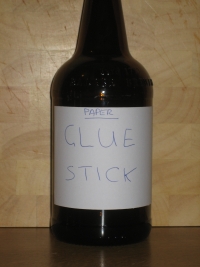
It was a very difficult decision between the two paper labels for first place. Both had good and bad points, but both looked excellent. They both have perfect edges and no crinkles. This one with the glue stick suffers only from a couple of bobbles under the label where bits of glue or something got under it. The glue stick appears to have left the paper slightly darker, but only very slightly. This is a professional looking label.
1st: Paper with milk
The winner for appearance is the label attached with milk. Just to confirm, there is no smell at all. The label itself is perfect. Its the whitest of all the labels - the milk seems to have left the paper in really good condition. The only downside of this method is the bottle itself around the label has some stains on, signs of the messy milk. I imagine with some practice just the right amount of milk could be applied to avoid this.
Final Appearance Notes:
The paper labels are clearly preferable to the stickers. They are thicker, and had less wrinkles. Either of the paper solutions would be a great way to attach labels. One interesting point is that having brought the bottles out of the cold brewery room, after a day all of them had considerably less crinkles, but even after this the order didn't actually change.
Friday, February 1, 2008
More wine bubbles...
The Beaverdale Merlot has been going for a week now. Time for another bubble count I think:
| Day | Time per bubble (secs) | bubbles per minute |
|---|---|---|
| 0 | infinite | 0 |
| 3 | 2 | 28 |
| 5 | 9 | 7 |
| 9 | 15 | 4 |
Observations:
- the bubbles were coming through extremely slowly now
- it was seemed to be very consistently one large bubble every 15 seconds
The instructions that came with the kit stated that fermentation for a red wine should take 15 to 20 days. It also said that less than one bubble every minute is a sign fermenting is ending. I therefore intend to leave the wine undisturbed for a little longer yet before taking any measurements. The target gravity is 990-994. I suspect the cool temperatures in the brewery are having an effect on the wine now. I'd be surprised if it is supposed to have slowed this much already. Like the beer, I consider this first wine a test of whether it brews well in the current conditions. I will make changes if they are needed for the next batches.
Subscribe to:
Posts (Atom)
 RSS feed